With so many blogs talking about making socks and the yarn for my next blanket not having arrived yet, I could resist the urge no longer and have started another pair of socks.
Now I have always made toe-up socks (using short rows with wrapped stitches) because I am not very good at picking up stitches (as happens with top-down socks) and I like the way they look but that is not to say that I have not had difficulties.
Now maybe you are not interested in making toe-up socks or maybe you do but have no problems at all. In which case this post is probably of no interest. I have written it just in case there is anyone out there who has had the same issues as myself.
Problem 1 – wrapped stitches
The problems I have had have been in knitting (or purling) the double wrapped stitches with their wraps when making short-row toes and heels. I have sometimes split the yarn and or dropped the stitch and had to pick it up again, all in all, giving a messy result.
I think that some other people must also find this a bit tricky too, as I have come across a couple of alternatives to the wraps. I have experimented with these but ended up deciding that I think the wraps method gives a better result.
But recently I had a bit of a breakthrough in my thinking and have developed a fairly problem free method of dealing with the wrapped stitches.
Problem 2 – holes when changing to circular knitting
Another problem I have had has been making sure that a hole didn’t develop at the end of the wrapped part when transitioning to circular knitting. The generic sock pattern I have been working from talks vaguely about picking up extra stitches on the first round and then decreasing on a later round. I have tried this ‘picking up and later decreasing’ but sometimes the process seemed to create more problems (= holes) than it solved and took a few rounds to sort out (badly!).
Like here.
However I have made four pairs of toe-up socks which equals eight socks which equals sixteen short row heels or toes. In the course of this I have discovered a much simpler method of ensuring that there are no holes and I would like to share this as well in case it can be of help to anyone.
Tutorial section
I am assuming that like me you pull the yarn firmly but not tightly when wrapping the stiches and knitting the following stitch, so as not to create unnecessary slackness in the yarn.
Knitting stitches with their wraps
Here is the stitch ready to be knitted.
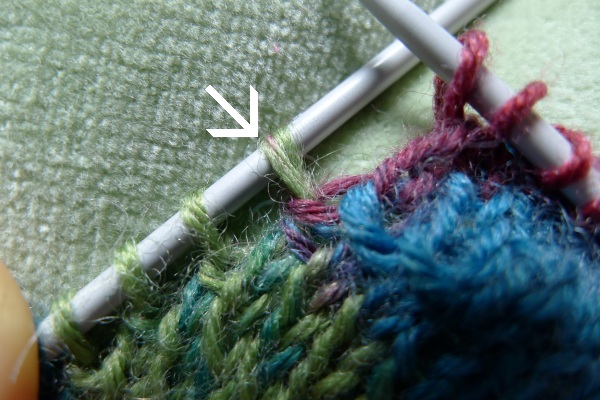
Firstly, you slide the stitch from the left needle onto the right hand needle and from now on keep your eye, and probably your finger, on it to make sure that it stays there.
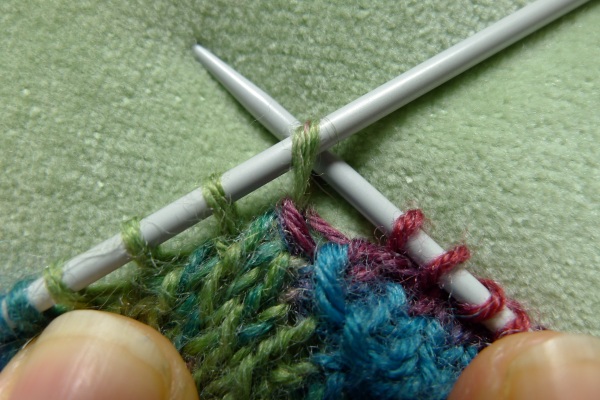
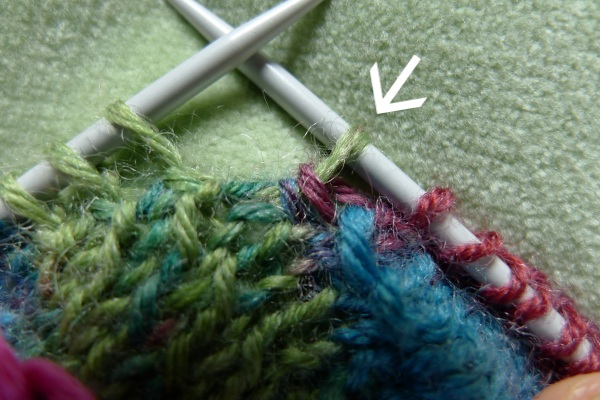
Now picking up the two wraps with the left needle will be no more difficult that picking up two stitches when doing something like a K2tog. I aim at the centre of the loops.
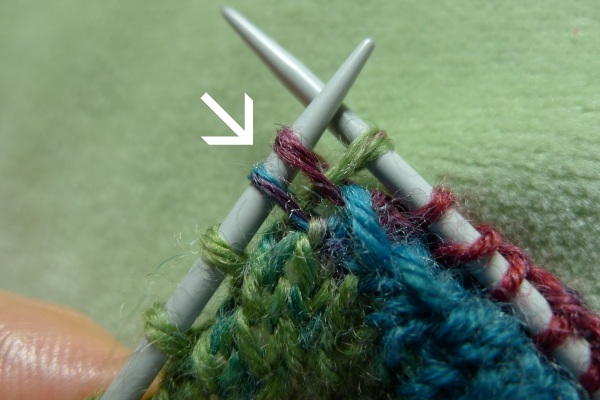
Once the stitches are cleanly on the left hand needle with no split yarn you can easily slip the right needle through the back of them. Remembering the finger of course!
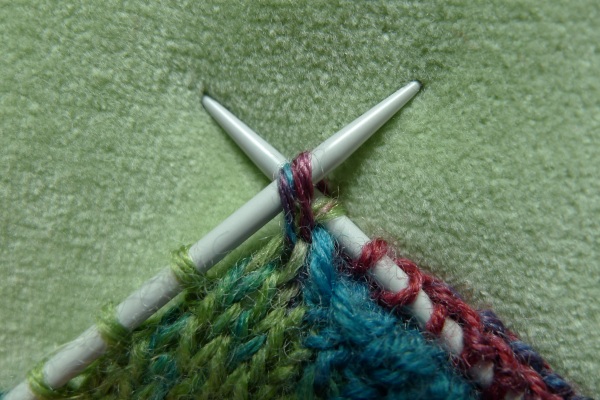
Now it is safe to remove the left needle, (though I often find with knitting stitches, I can simply insert the left needle through the remaining stitch without removing it.)
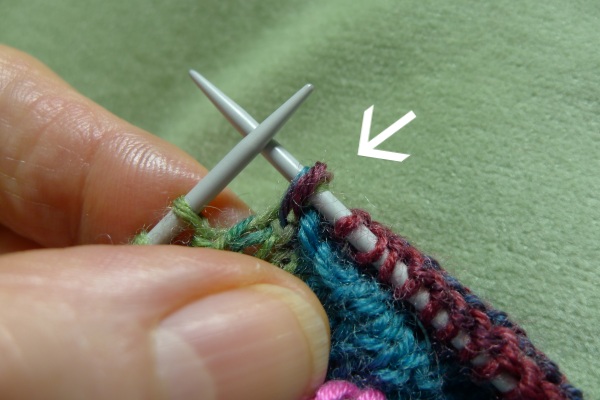
Lastly you insert the left needle through all three loops in front of the right needle which should be straightforward as they are cleanly and securely on the right needle.
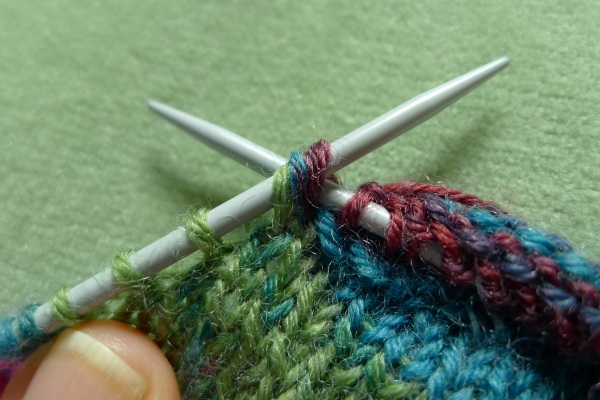
(I haven’t done a picture as it would have been too difficult but if there is any uncertainty you can look through the hole below the right needle from the point of that needle.)
Now you can wrap the yarn round the right needle in the normal way
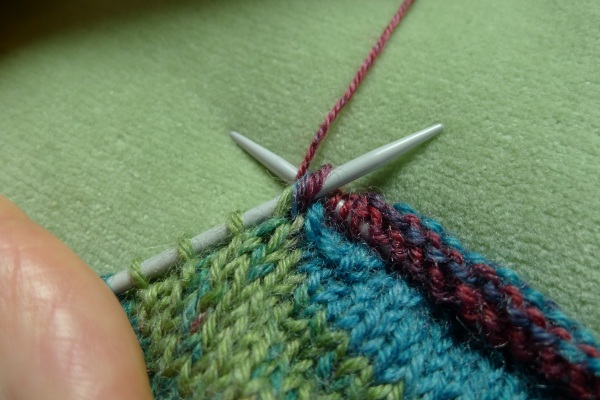
pull through
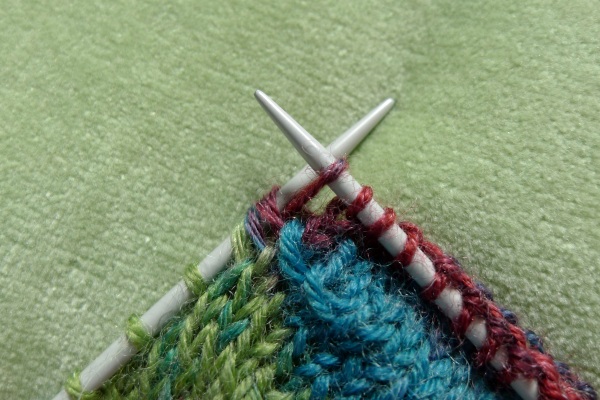
and complete the stitch.
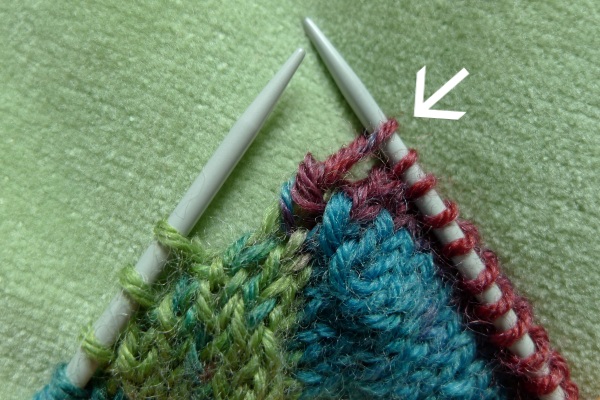
You may notice that I keep the stitches well down the needles whenever possible.
The procedure is essentially the same for purling but I have included a few pictures for completeness.
Purling stitches with their wraps
The stitch ready to be purled.
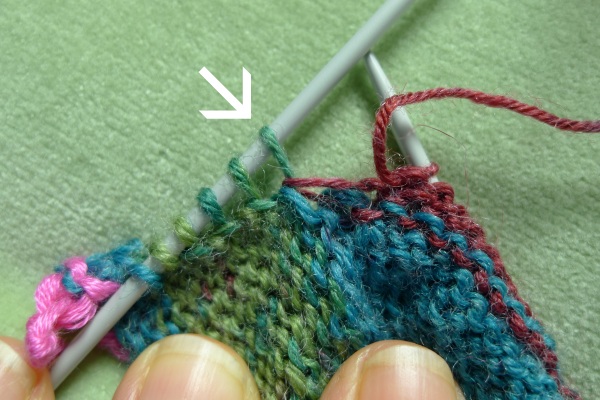
Slid onto the right needle.
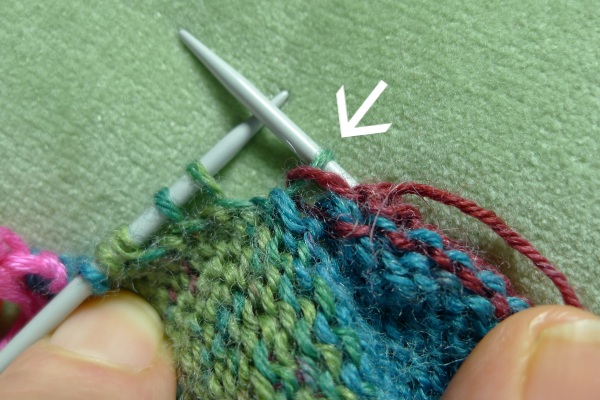
Picking up the wraps with the left.
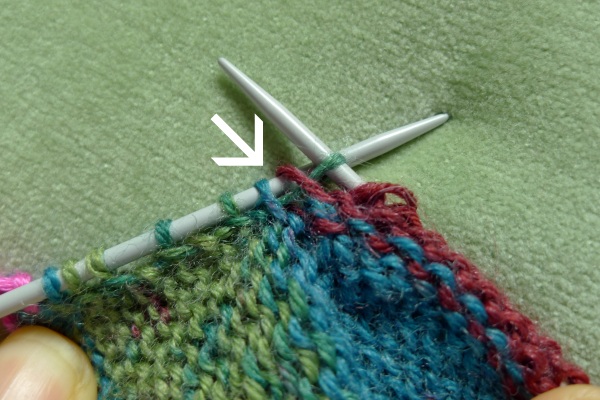
Right needle through the wraps.
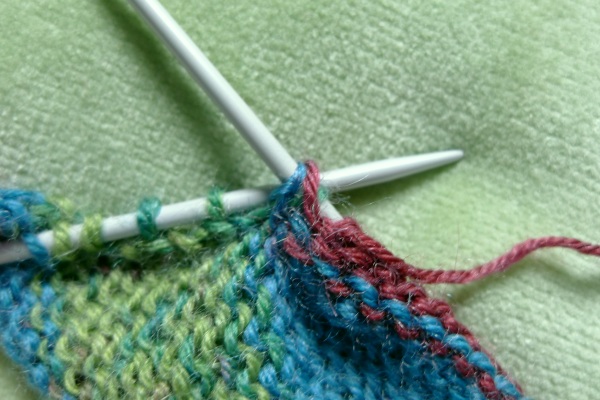
Left needle removed and inserted through all three loops behind the right needle.
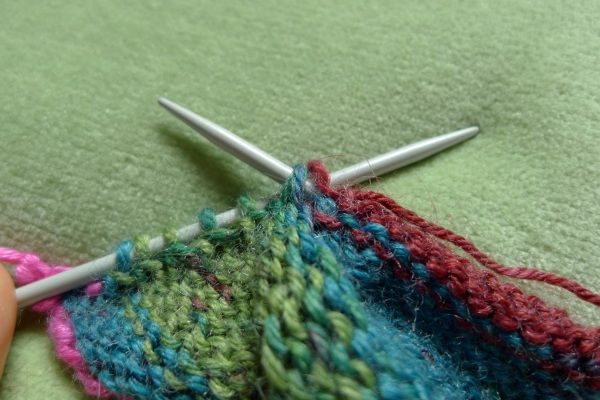
Yarn pulled through as usual.
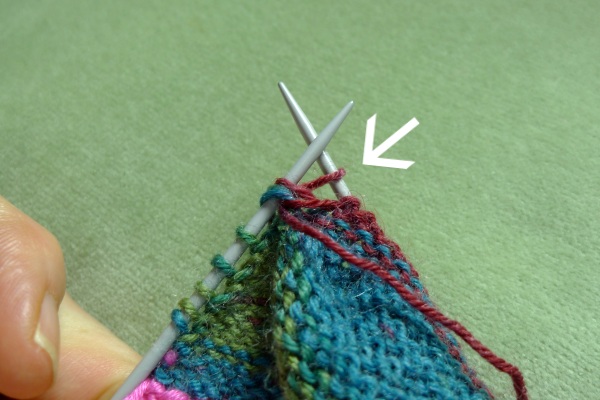
Stitch completed.
Ensuring no holes
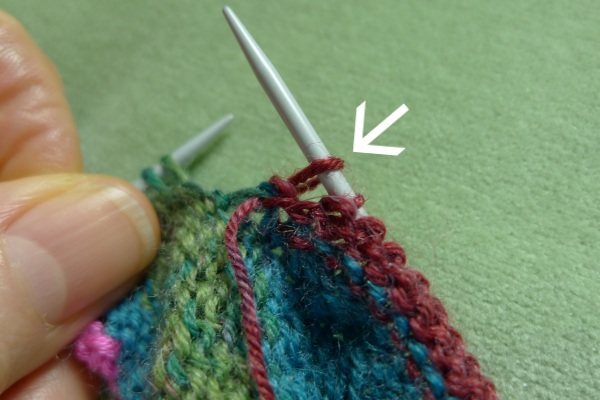
When you have knitted and purled all the wrapped stitches and are ready to pick up the stitches from your provisional cast on, the important thing is to make sure that you put the first and last of the picked up stitches on appropriate needles next to the adjoining first or last stitch you have been knitting on the straight needles. The reason for this is so that as you work back along the stitches you have just been using you can knit the end stitches together (K2tog).
So you start your first round with a K2tog and you have another about half-way round.
Now
You are going to say to me ” But now I am two stitches short!” – my original response is below the pictures.
Since writing this tutorial I have turned another toe and heel (on my second sock) and have decided that the best method is to knit the first two end stitches together as described above, then the second lot at the other end of the heel stitches, then straight after do an M1 – which is to say pick up the strand before the next stitch and knit into the back (so there is no hole). When you get back to the beginning do an M1 as before into the last gap. So now you are back to the right number of stitches.
[However, this is still a work in progress for the perfect solution and I read something where the person suggested you start knitting in the round when you have knitted the last wrapped stitch but still have one left to purl. I want to try this.]
Addendum
After turning the first heel I had two things to add and they were –
- When turning the heel don’t let the end stitches on the needle holder stretch because if you do you will need to tighten them back up by loosening the other stitches that have tightened to enable them to stretch. (I had to do this; I will put my spare stitches on something light like a piece of yarn next time.)
- The best way to increase the number of stiches back up to the right number, after having done the K2togs on the first round, is to do an M1 – which is to say pick up the strand between the stitch that had been on the holder and the decrease stitch and knit into the back (so there is no hole). This actually helps tighten everything up.
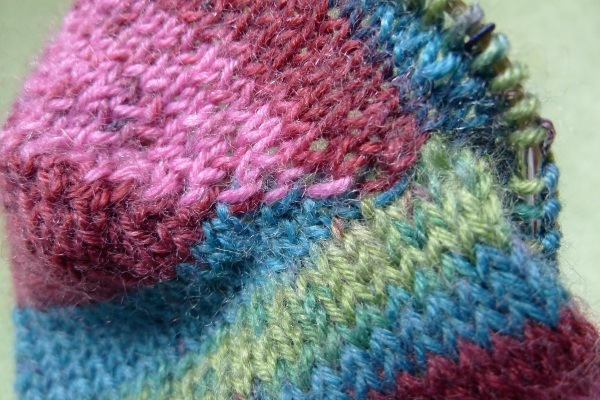
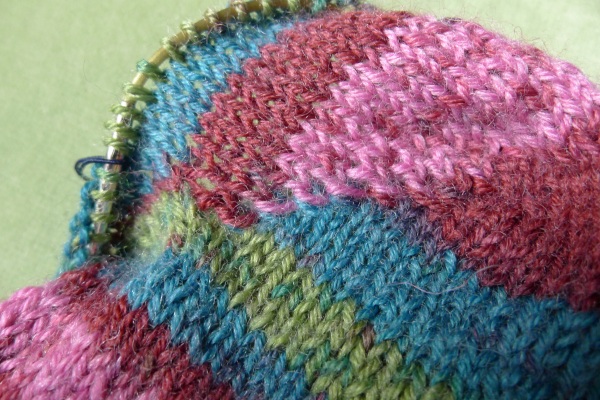
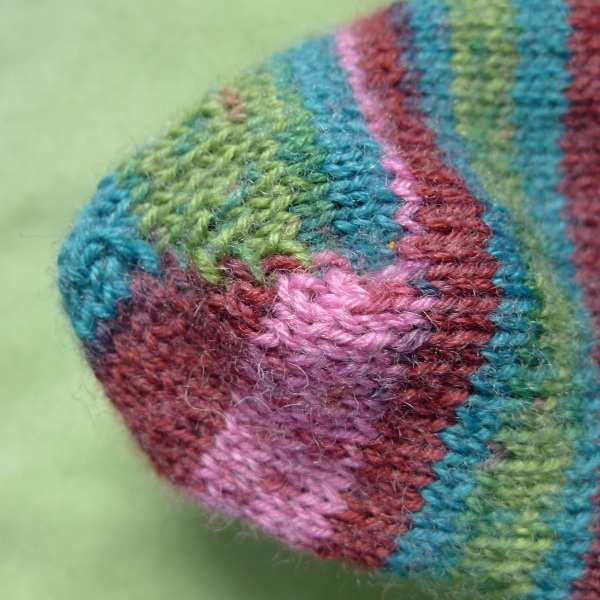
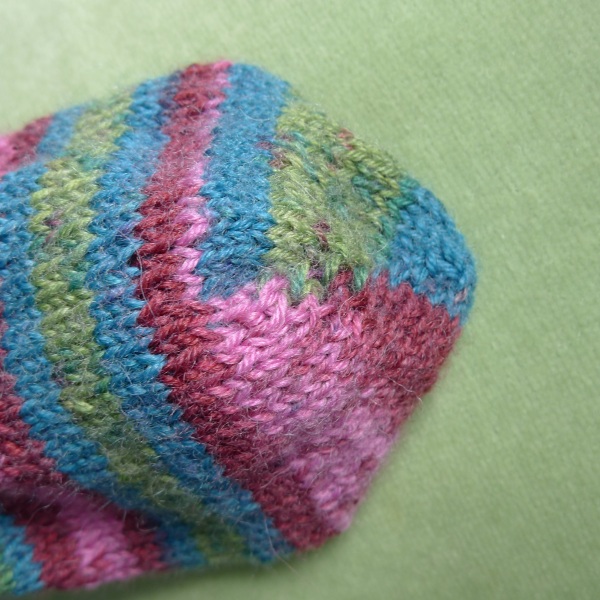
Pictures of the heel to show the result.
This was my original response to the question of compensating for the K2togs
I have not decided on a ‘best’ solution to this and I think it depends on how you feel about these things, and maybe the shape of your feet and ankles, but there are a few solutions which I will list below.
- You could simply increase in the decrease stitches on the next round. (I was afraid when I started this sock that that might make a hole – though I now think I am wrong – so I chose a different method.
- I cast on an extra two stitches at the beginning and, forgetting about the heels – now having an extra four stitches – knitted two together on the second round as well.
- If you don’t mind having an extra two stitches when doing the foot you could leave these two extra stitches on the top half of the sock and use them when doing the K2togs for the heel.
When doing the heels if you don’t have two extra stitches already, as in option three, you could either increase after the short-rows, as in option one, or increase at both ends of the last row of the stitches you will put on a needle holder while making the heel.
I hope this doesn’t sound too confusing – but I always think choice is good!

I just finished my first pair of toe-up socks, and dealing with the wrapped stitches was very difficult! The heels turned out very holey (or lumpy in places) and my tensions was far too loose, so although the socks are sock shaped and wearable, I’ve kind of written them off as practice pair. It’s nice to know I’m not the only one struggling with the wrapped stitches. I’d planned to try a different short row method that doesn’t involve wrapped stitches, but reading your post I’m tempted to give it another try. Hmmm… decisions, decisions…
LikeLike
If you have time you could always do what I do and do small samples. Maybe DK yarn with less stitches using wraps on one and the other method on the other and see how it goes. Or one method next pair and the other for the following pair.
LikeLike
I think I’ll try this method I found on youtube next and see what happens http://www.youtube.com/watch?v=zu5YAKsAEpY&index=2&list=FLOlSHQgm5UOXUXtRSuIszdA
LikeLike
I’d be interested to know how you get on with it. If I get time I may try a small sample.
LikeLike
I shall squirrel your advice away for when I try ‘toe up’
LikeLike
I notice that there are several methods for toe-up socks, not that I have tried them, but I do think that the wraps method makes a smooth fluid sock.
LikeLike
I have seen video tutorials, but NOTHING as clear as your explanation here. The fact that each of the key elements (each of the wrapped stitches and the ‘target’ stitch) were in different colors made it plain for me for the first time ever! Your progressive photos and instructions made all the difference. Thanks SO much!
LikeLike
So pleased to be of help. I suppose that is why I took the time to make the tutorial. 🙂
LikeLike
Brilliant Jane!!!
LikeLike
Thank you! 🙂
LikeLike
I am actually making my first ever pair of socks and have practiced turning the heel before I started the real sock! Your photo tutorial does exactly what I was taught and makes picking up the wraps much easier. My pattern is for top down using wrap and turn for the heel. I also want to try an alternative method involving picking up stitches as I did making Christmas stockings using two needles. Just makes me so excited at how brilliant knitting is- so mathematical and technical AND creative too!
LikeLike
I find your comment interesting as I was never taught to knit wraps and was muddling aong trying to pick stitch and wraps with the right needle all in the same action, which sometimes worked and sometimes didn’t. 🙂
I’ll be interested to see your socks. I like my method so much I don’t know if I’ll ever do top down but it is very intersting to see all the different methods and of course there’s toes too.
I share your excitement at all the different aspects of knitting (and crochet too!)
LikeLike
[…] system of wrapping stitches began to make sense. Having done this I was pleased to see a post by Rainbow Junkie who has produced a very easy to follow step by step photo tutorial on this very […]
LikeLike